
Integrating with Bubble
Bubble is one of the most popular no-code platforms that enable building technical and tech-related products without writing code.
We see a lot of creator-focused products coming up in the recently growing creator economy. Many of them are started either by creators who understand the pains they have to go through while being a creator or by folks who understand this domain well in terms of serving creator needs but may not be the best people to write code and build a product. This is where leading platforms like Bubble come in and solve real issues for these entrepreneurs looking to build for creators.
Since we are building data infrastructure for the creator economy, we have also seen this trend among our customers. Many developers we talked to and partnered with built their apps on top of Bubble. This is where we thought we could do something better to make their lives easier.
The rest of this tutorial assumes that you are familiar with how to use Bubble and already have an account and an app set up with Bubble. It's free and easy, just head over to their website and follow the recommended steps.
Overview
These are the main steps that you need to follow to start using Connect SDK in your Bubble app.
How it works
Installation
Setup
Account connection
Listen to webhook notifications for updates
Data fetch
How it works
Before we get into the specifics of how the the plugins for Bubble works, let's take a quick look at how it works so that you have a better understanding of the plugins and get an idea about the kind of workflows you might want to build using them.
Create a user (using APIs): Generate a unique user ID for each user. This is a one-time step, which could most ideally be done immediately after the user sign up journey in Bubble.
Create an SDK token (using APIs): when the user wants to make a new account connection, generate an SDK token that will help open the Connect SDK.
Connect an account (using Connect SDK): initialize the Connect SDK to enable the users to connect their accounts. We'll explain about the SDK in the description of this step.
Get updates to account data (using APIs): using webhooks, you can get notified about any updates to the account data and then use that event notification to fetch the fresh data and run your other use-case-based logic.
Fetch data (using APIs): as soon as an account is successfully connected, you can start fetching data using the APIs.
All the APIs are authenticated using a client ID and secret. If you don't already have them, sign up to get one.
The APIs must be called only from your server or backend workflows and never from your app/frontend, as this could cause security issues.
We highly recommend that you also read about the terminology used in integrations and throughout the product by reading our glossary page and understanding our data hierarchy.
With this understanding, let's move forward and see how we can set up Bubble to work for us in a similar workflow.
Installation
Installing the plugins is the same as installing any other plugin on Bubble.
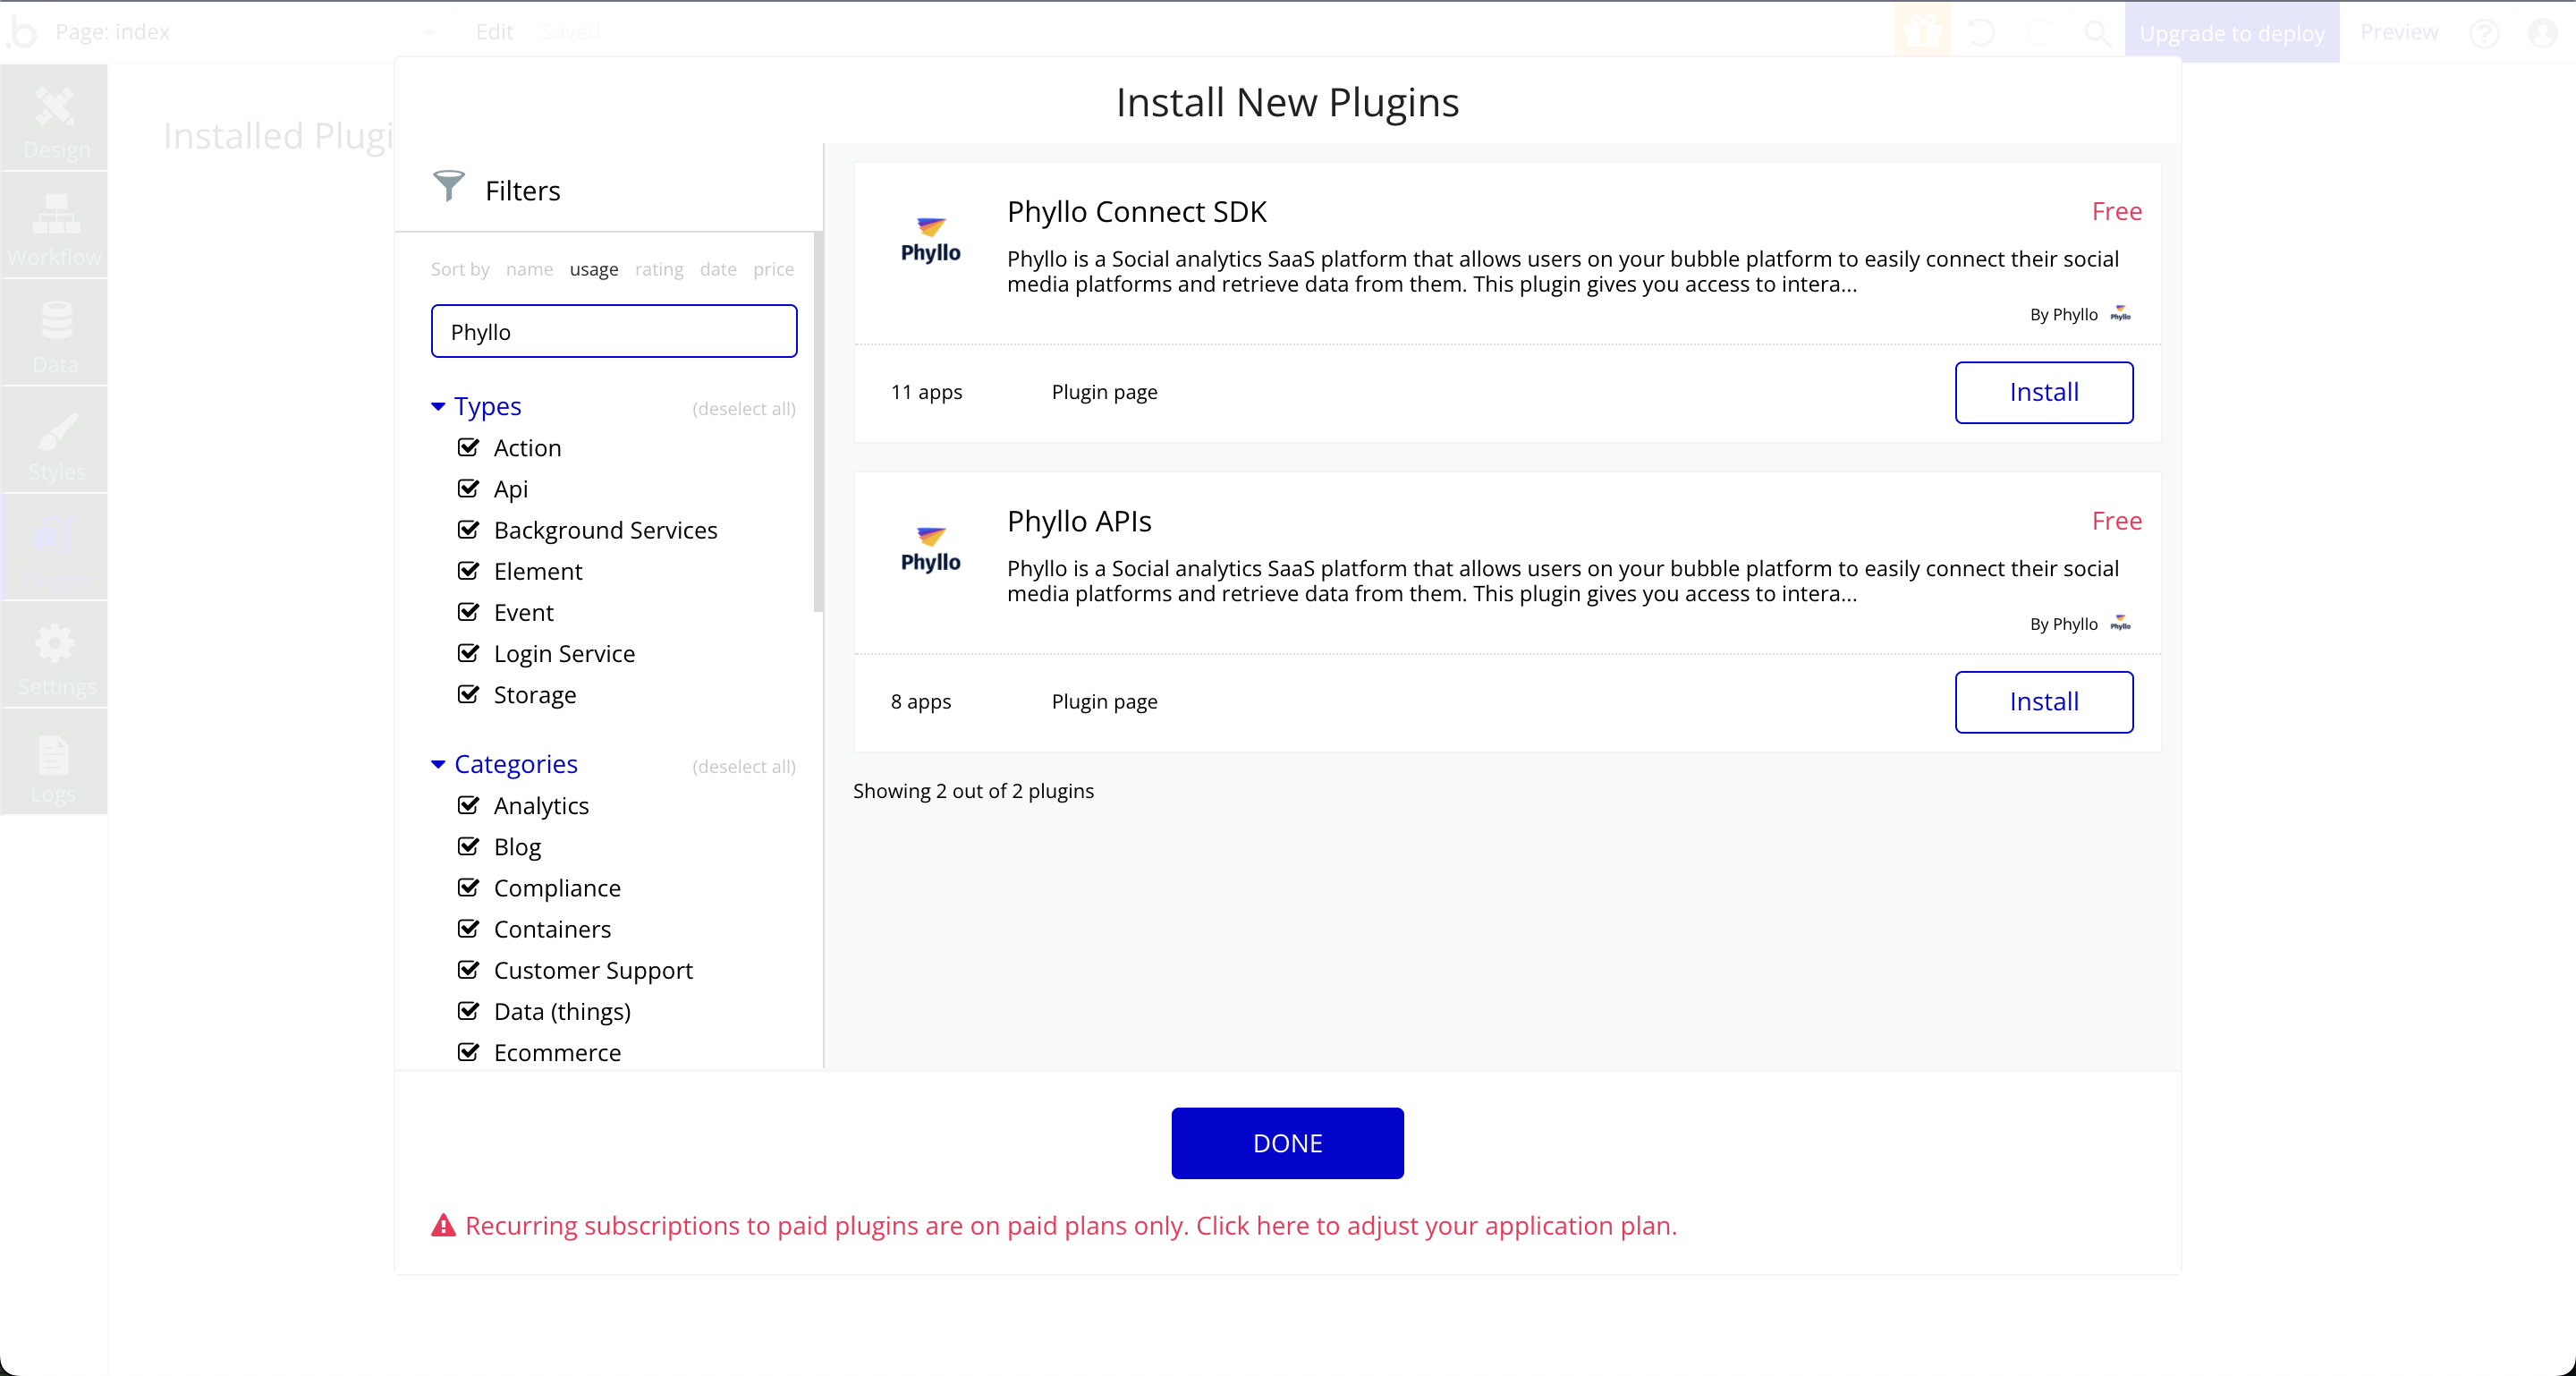
However, as you might have noticed in the above section, there are two components to the integration - the APIs and the Connect SDK. The APIs run on the server side, and the Connect SDK presents itself on the user interface for the user to interact with and create a successful account creation. To separate these two components, we have built two Bubble plugins that simplify your usage and understanding and streamline your integration.
To get the full benefit of the product offerings, we recommend installing and utilizing both the plugins in your integration and user journey.
Connect SDK
Go to the plugin marketplace and search for "Connect SDK". Or click here to go directly to the plugin.
Click on the "install" button.
Click on the "done" button.
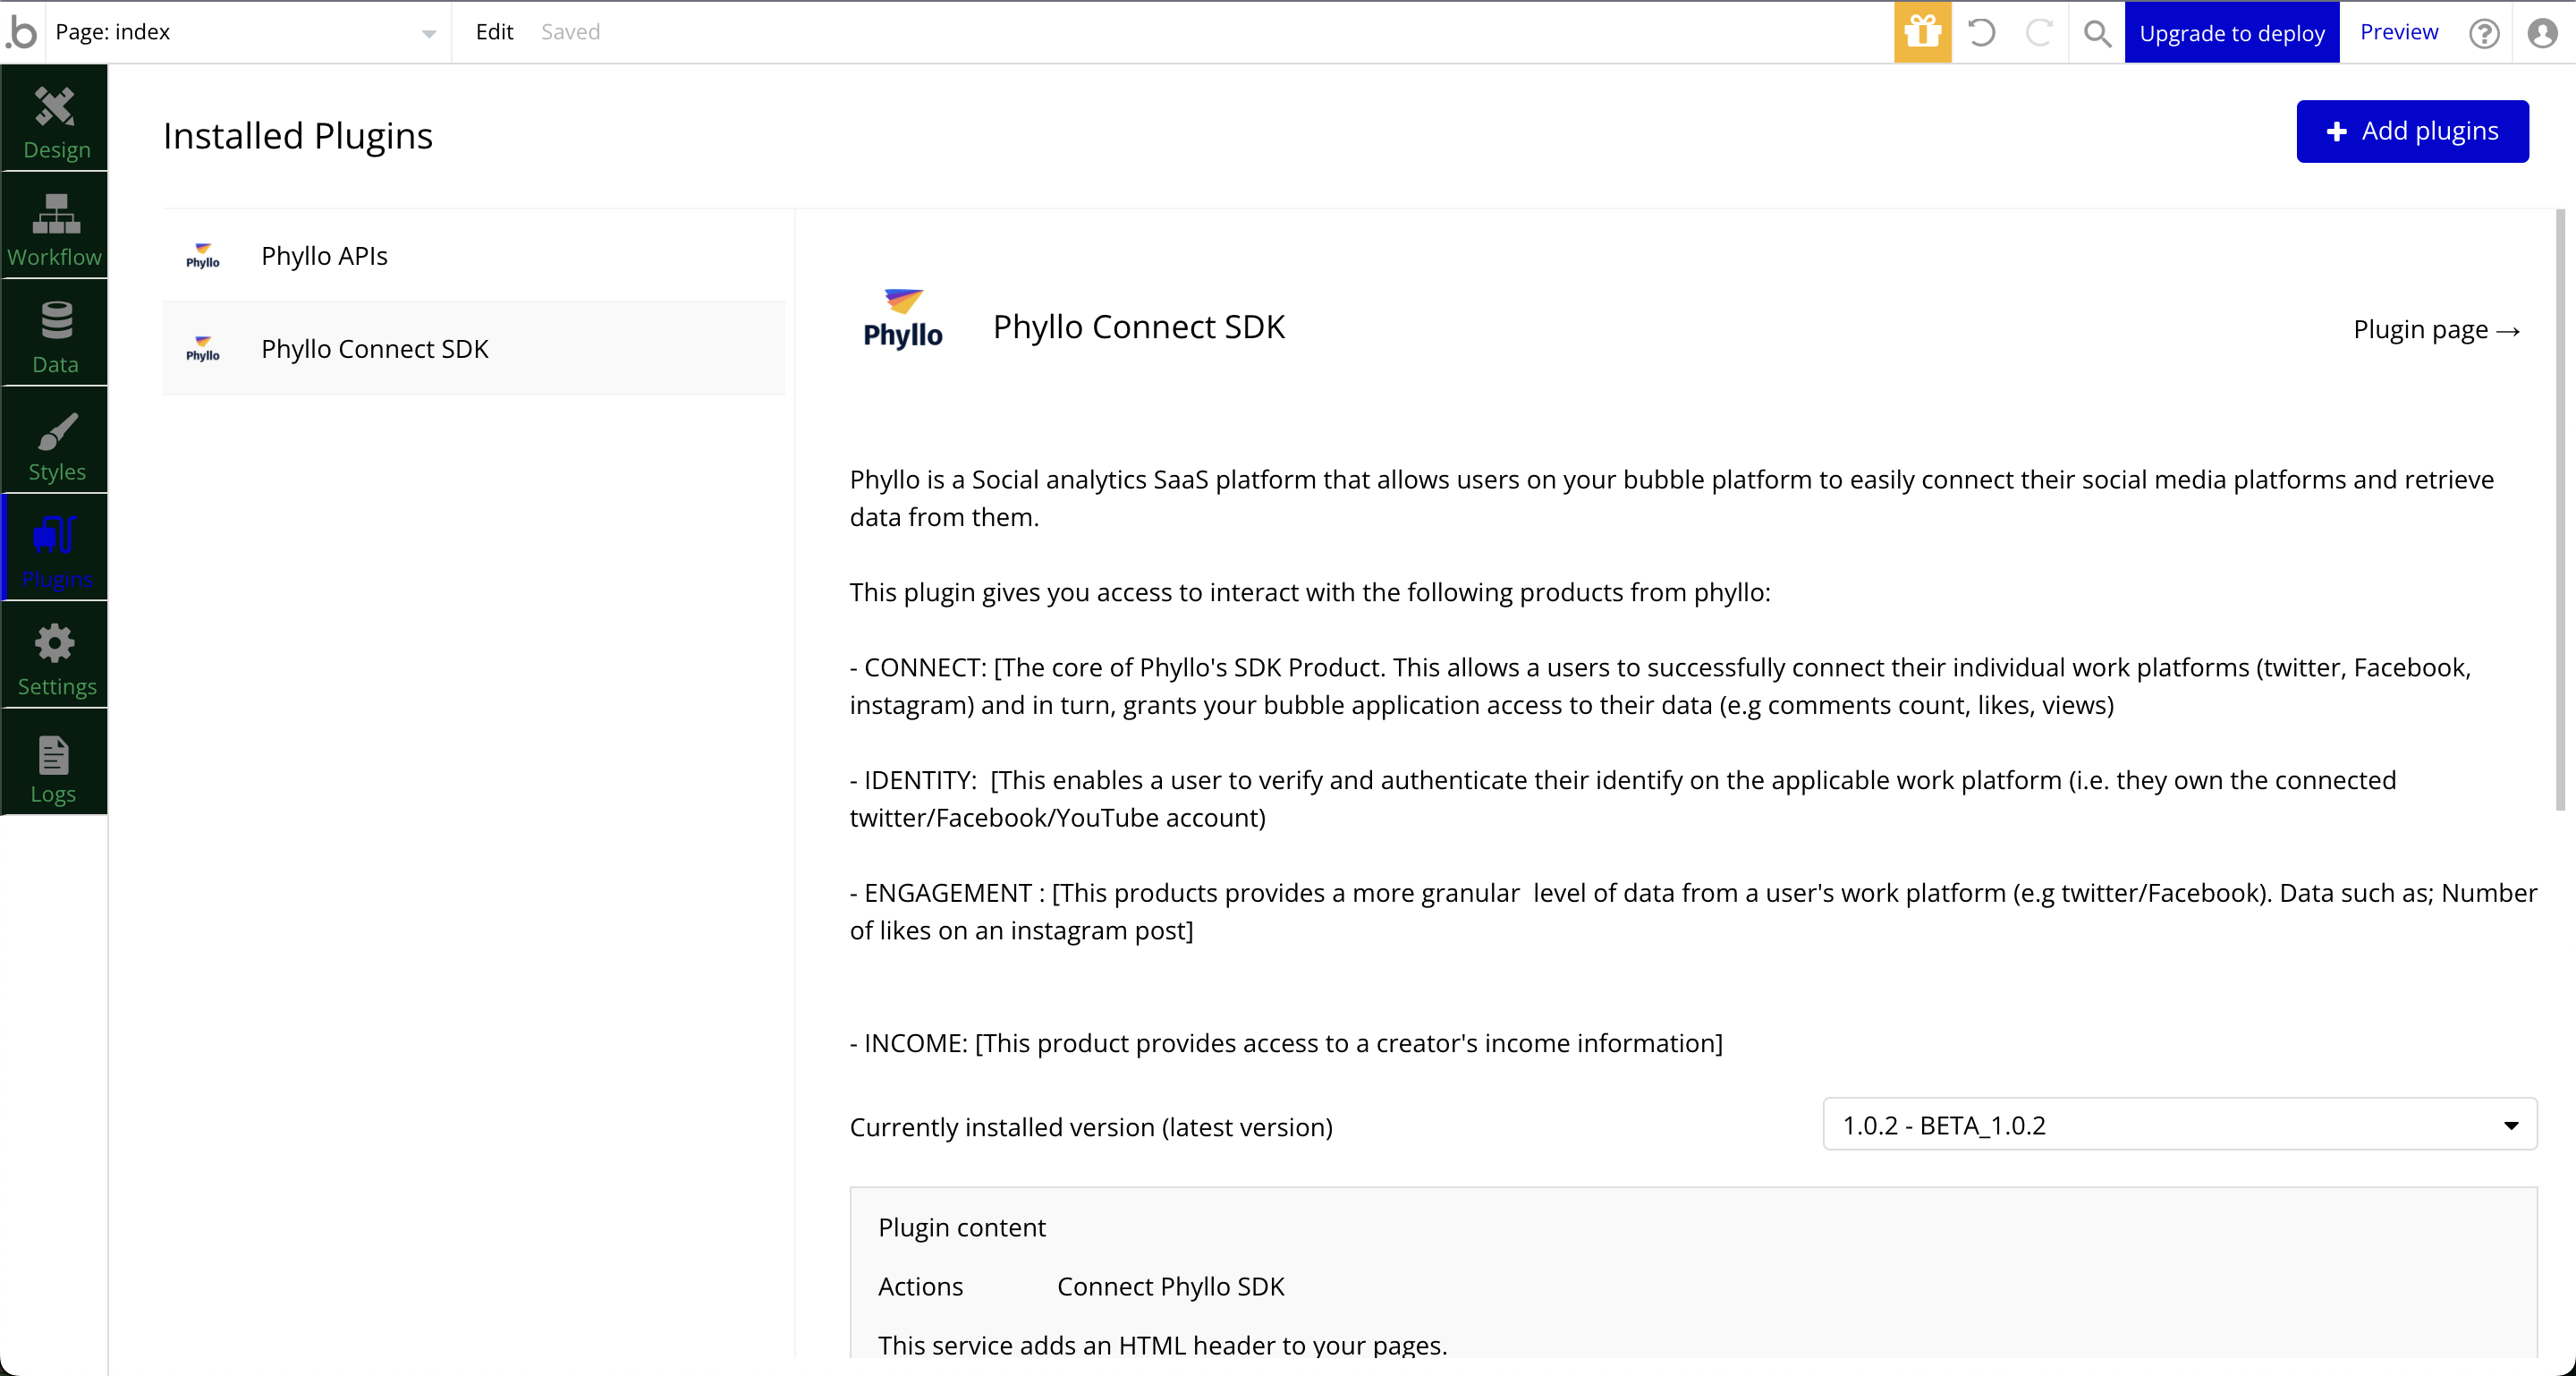
Phyllo APIs
Go to the plugin marketplace and search for "Phyllo APIs". Or click here to go directly to the plugin.
Click on the "install" button.
Click on the "done" button.
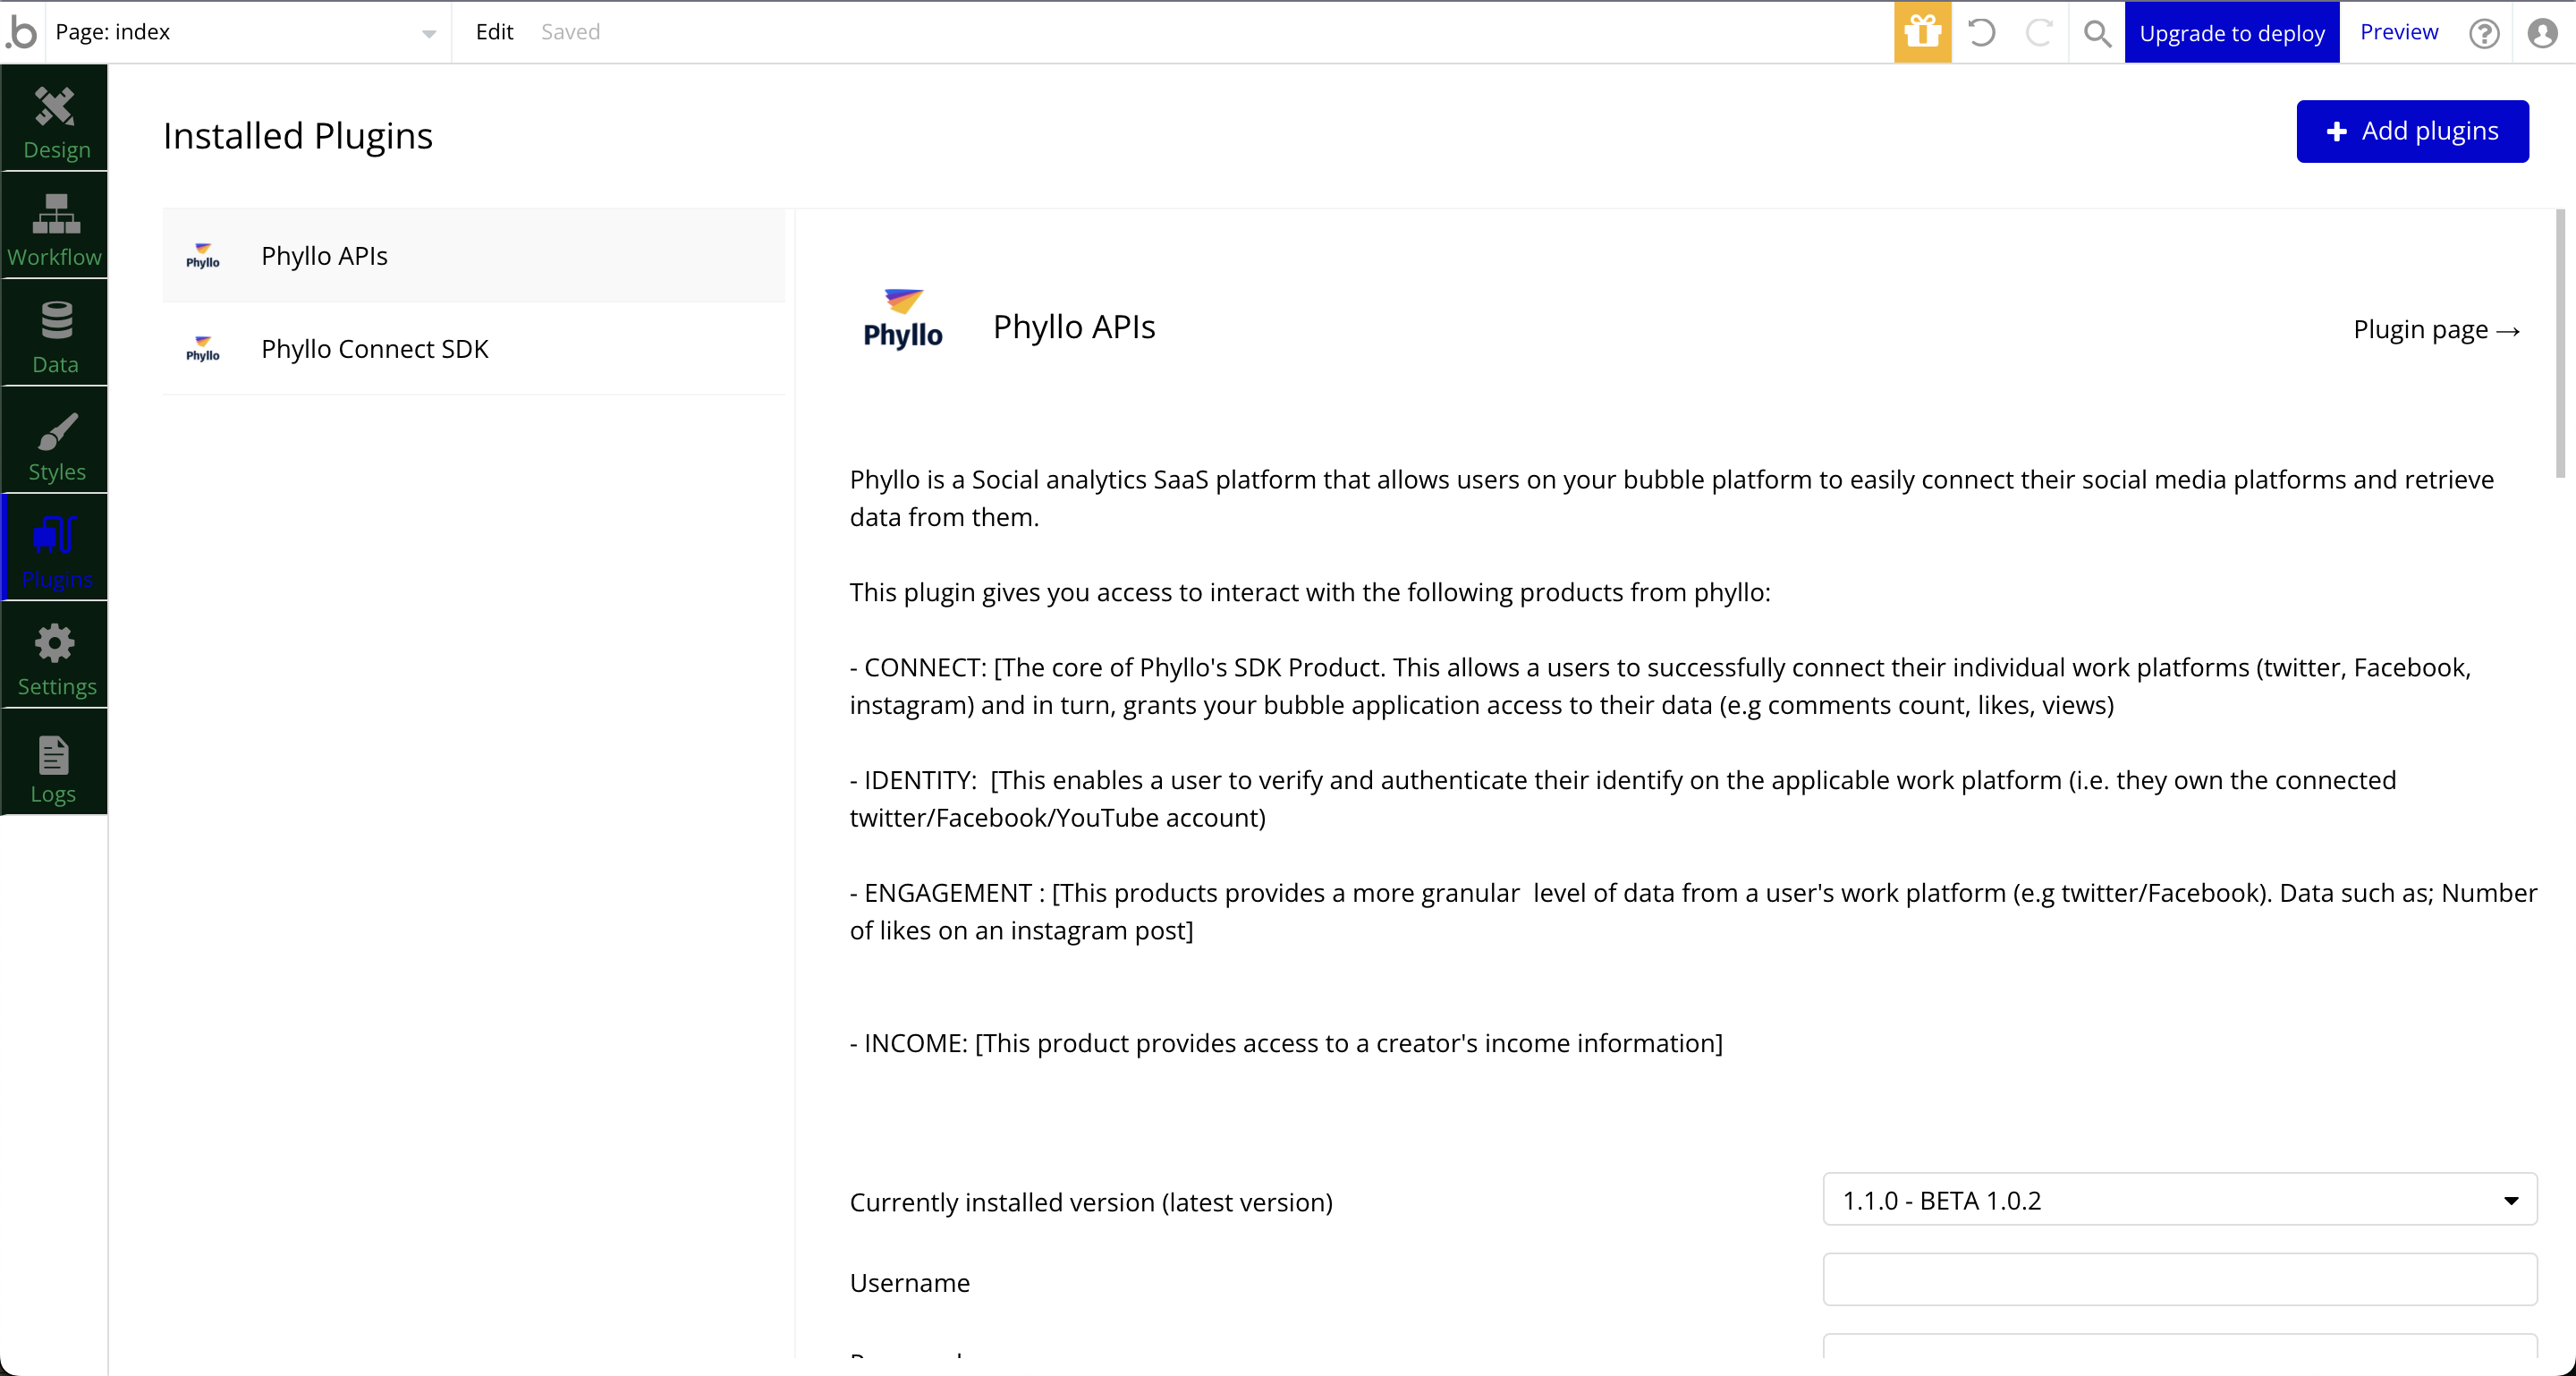
And you're done! Let's see how you can set these up to be used seamlessly with your app.
Setup
Credentials
The only essential requirement to set up and use Phyllo is to have your API credentials. If you don't already have them, sign up to get one. The setup step is only required for the Phyllo APIs plugin.
Go to your app's "Plugins" section and click on the "Phyllo APIs" plugin.
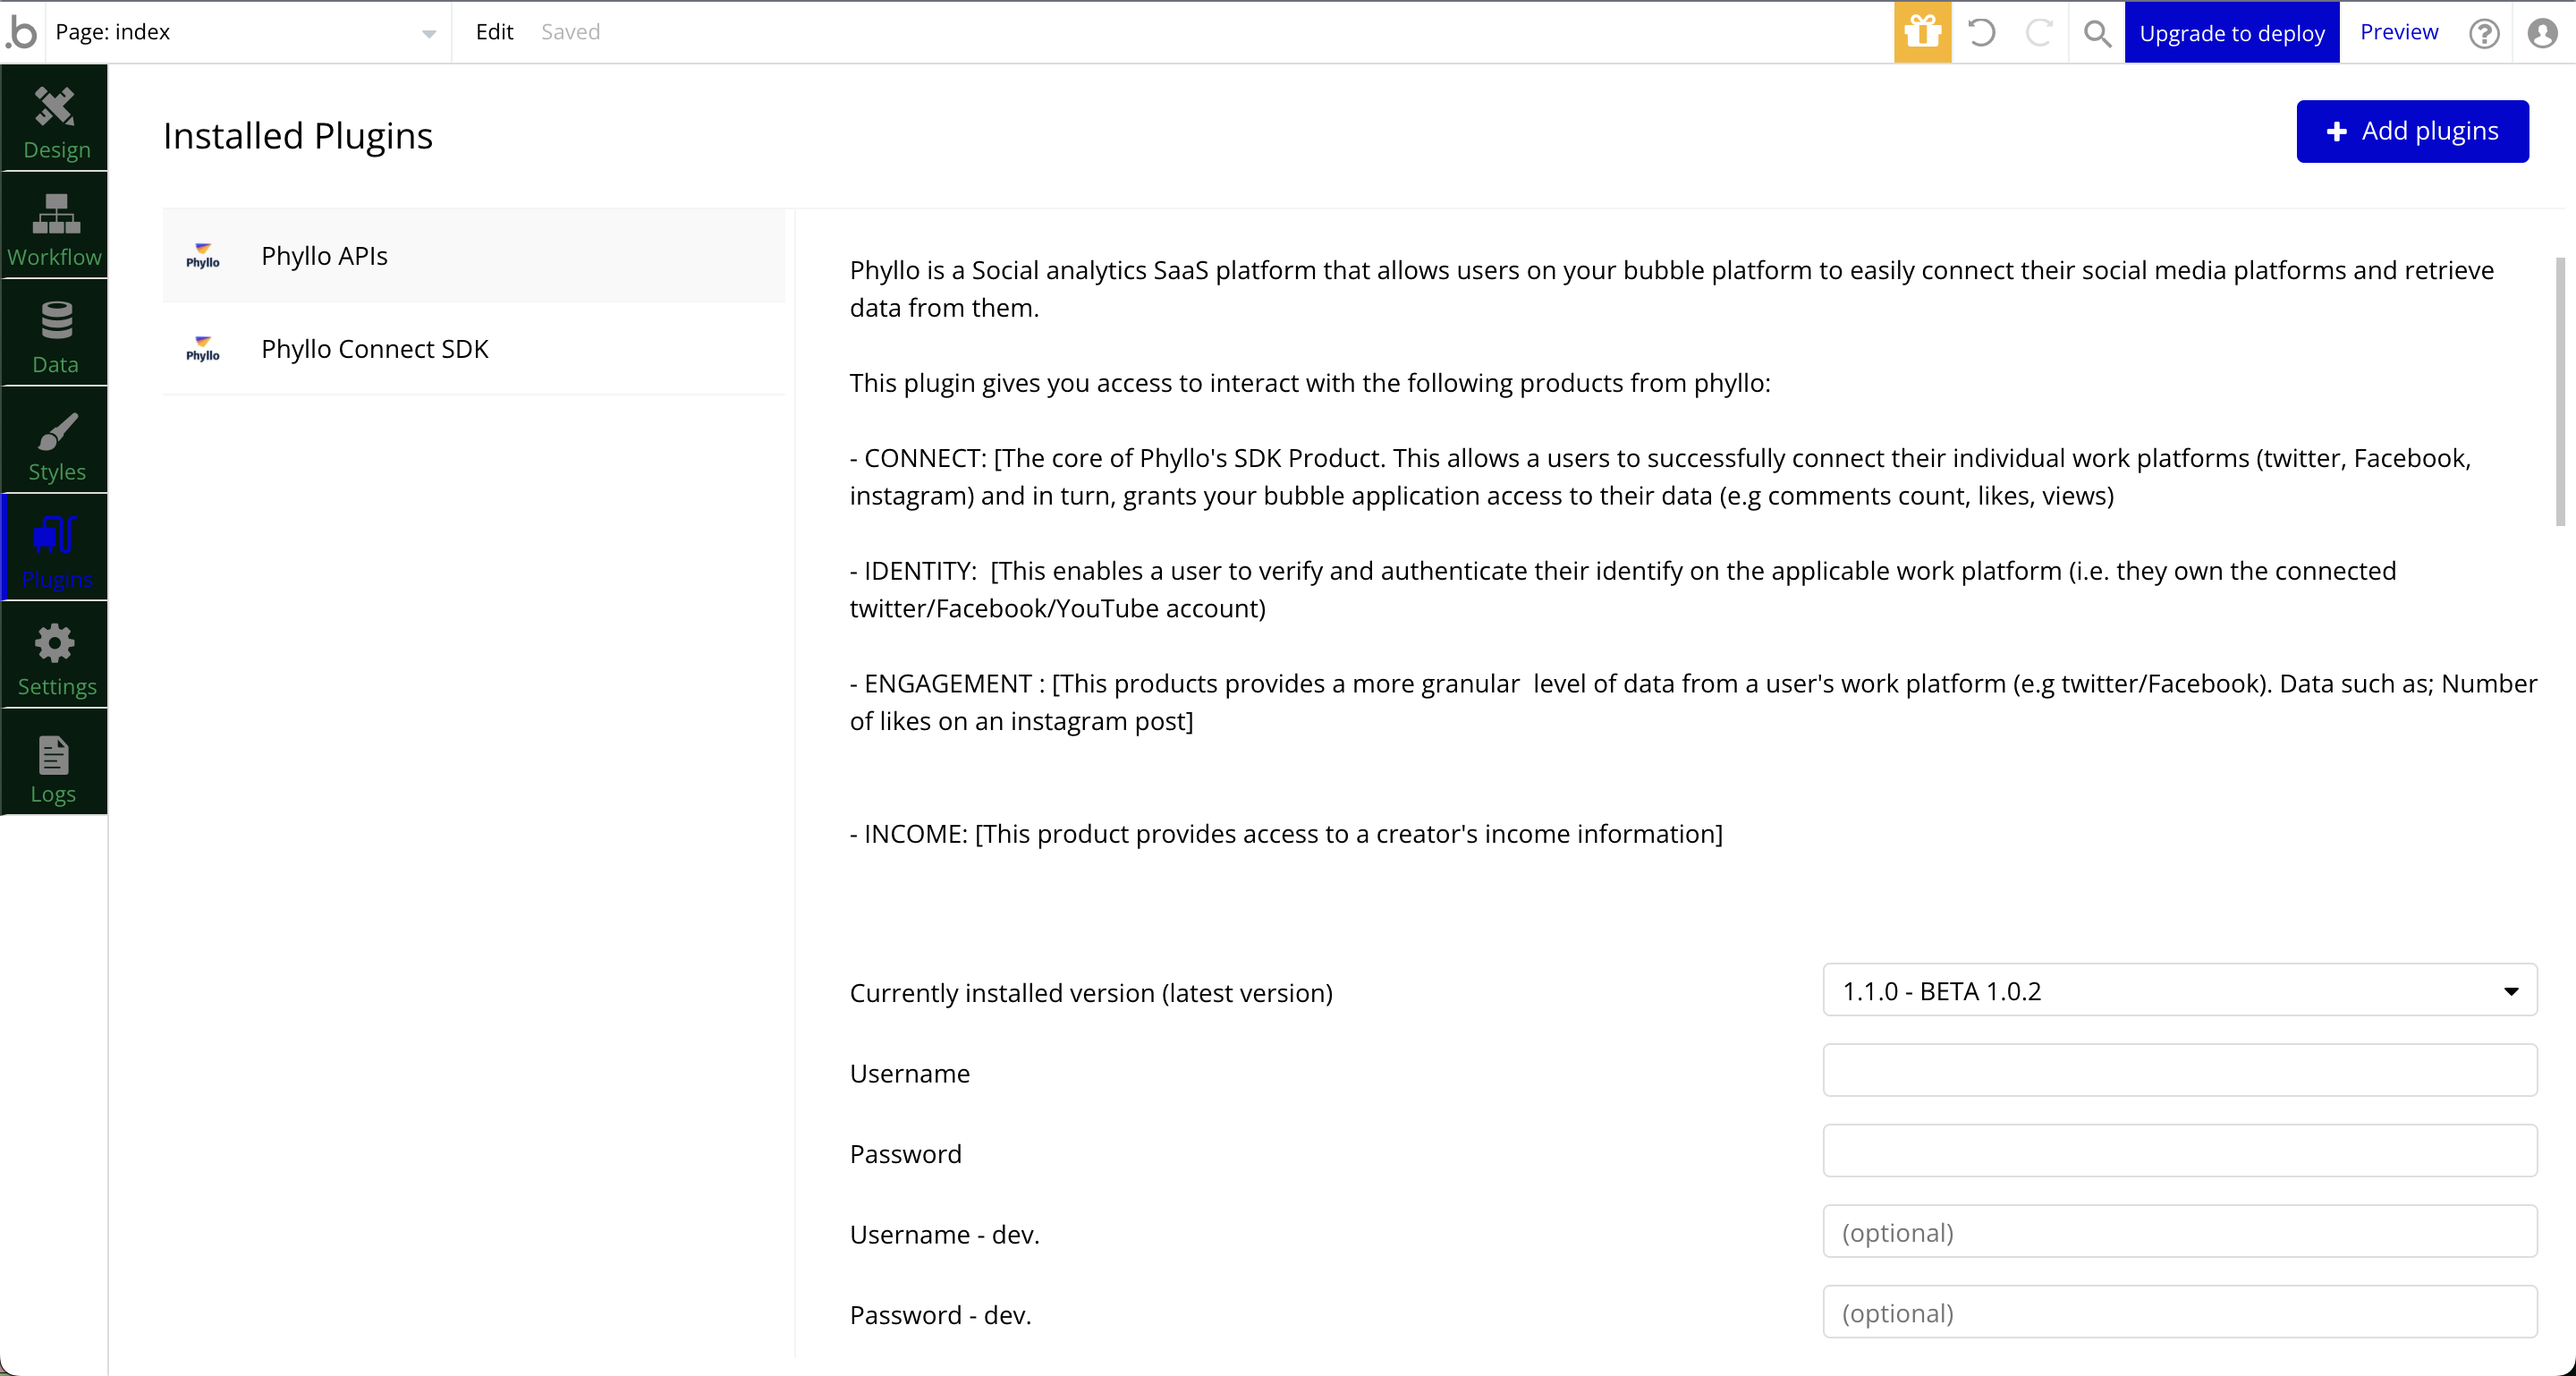
Fill in your Phyllo staging credentials - "client ID" in "username - dev." and "secret" in "password - dev." fields. For production, you may fill the "client ID" in "username" and "secret" in "password" fields.
Database
You would need to make changes to your Bubble database to accept and store the data provided and used for a proper Phyllo integration. We will discuss these changes in the relevant steps as and when the necessity arrives.
Depending on your preference, you could follow them along with the steps or do them all at once after reading through this tutorial.
Webhooks - API workflows
Briefly speaking, webhooks are a mechanism for an origin server to inform a recipient server about a particular event, notification, or update. This is done by calling a designated URL on the recipient server, just like a regular API call, with some data about the event. The recipient server has to accept and acknowledge the request by returning an HTTP 200 response and then process the delivered data the way the origin server specifies.
To continue receiving data-related and account-related updates, webhooks are the most crucial aspect of Phyllo integration. It ensures that your Bubble app is updated with all the relevant events and data changes happening in the Phyllo system. Read more about Phyllo webhooks here.
Webhooks are managed through Workflow APIs in Bubble. You can read about them here and here in more detail. Enabling this requires a non-Free subscription on Bubble. Once you subscribe to a paid plan and familiarize yourself with the Workflow APIs, you can follow the steps below.
Go to your app's Settings on Bubble, select the "API" section, and turn on the "Enable Workflow API and backend workflows" option. You will be shown the base URL for all your Workflow APIs.
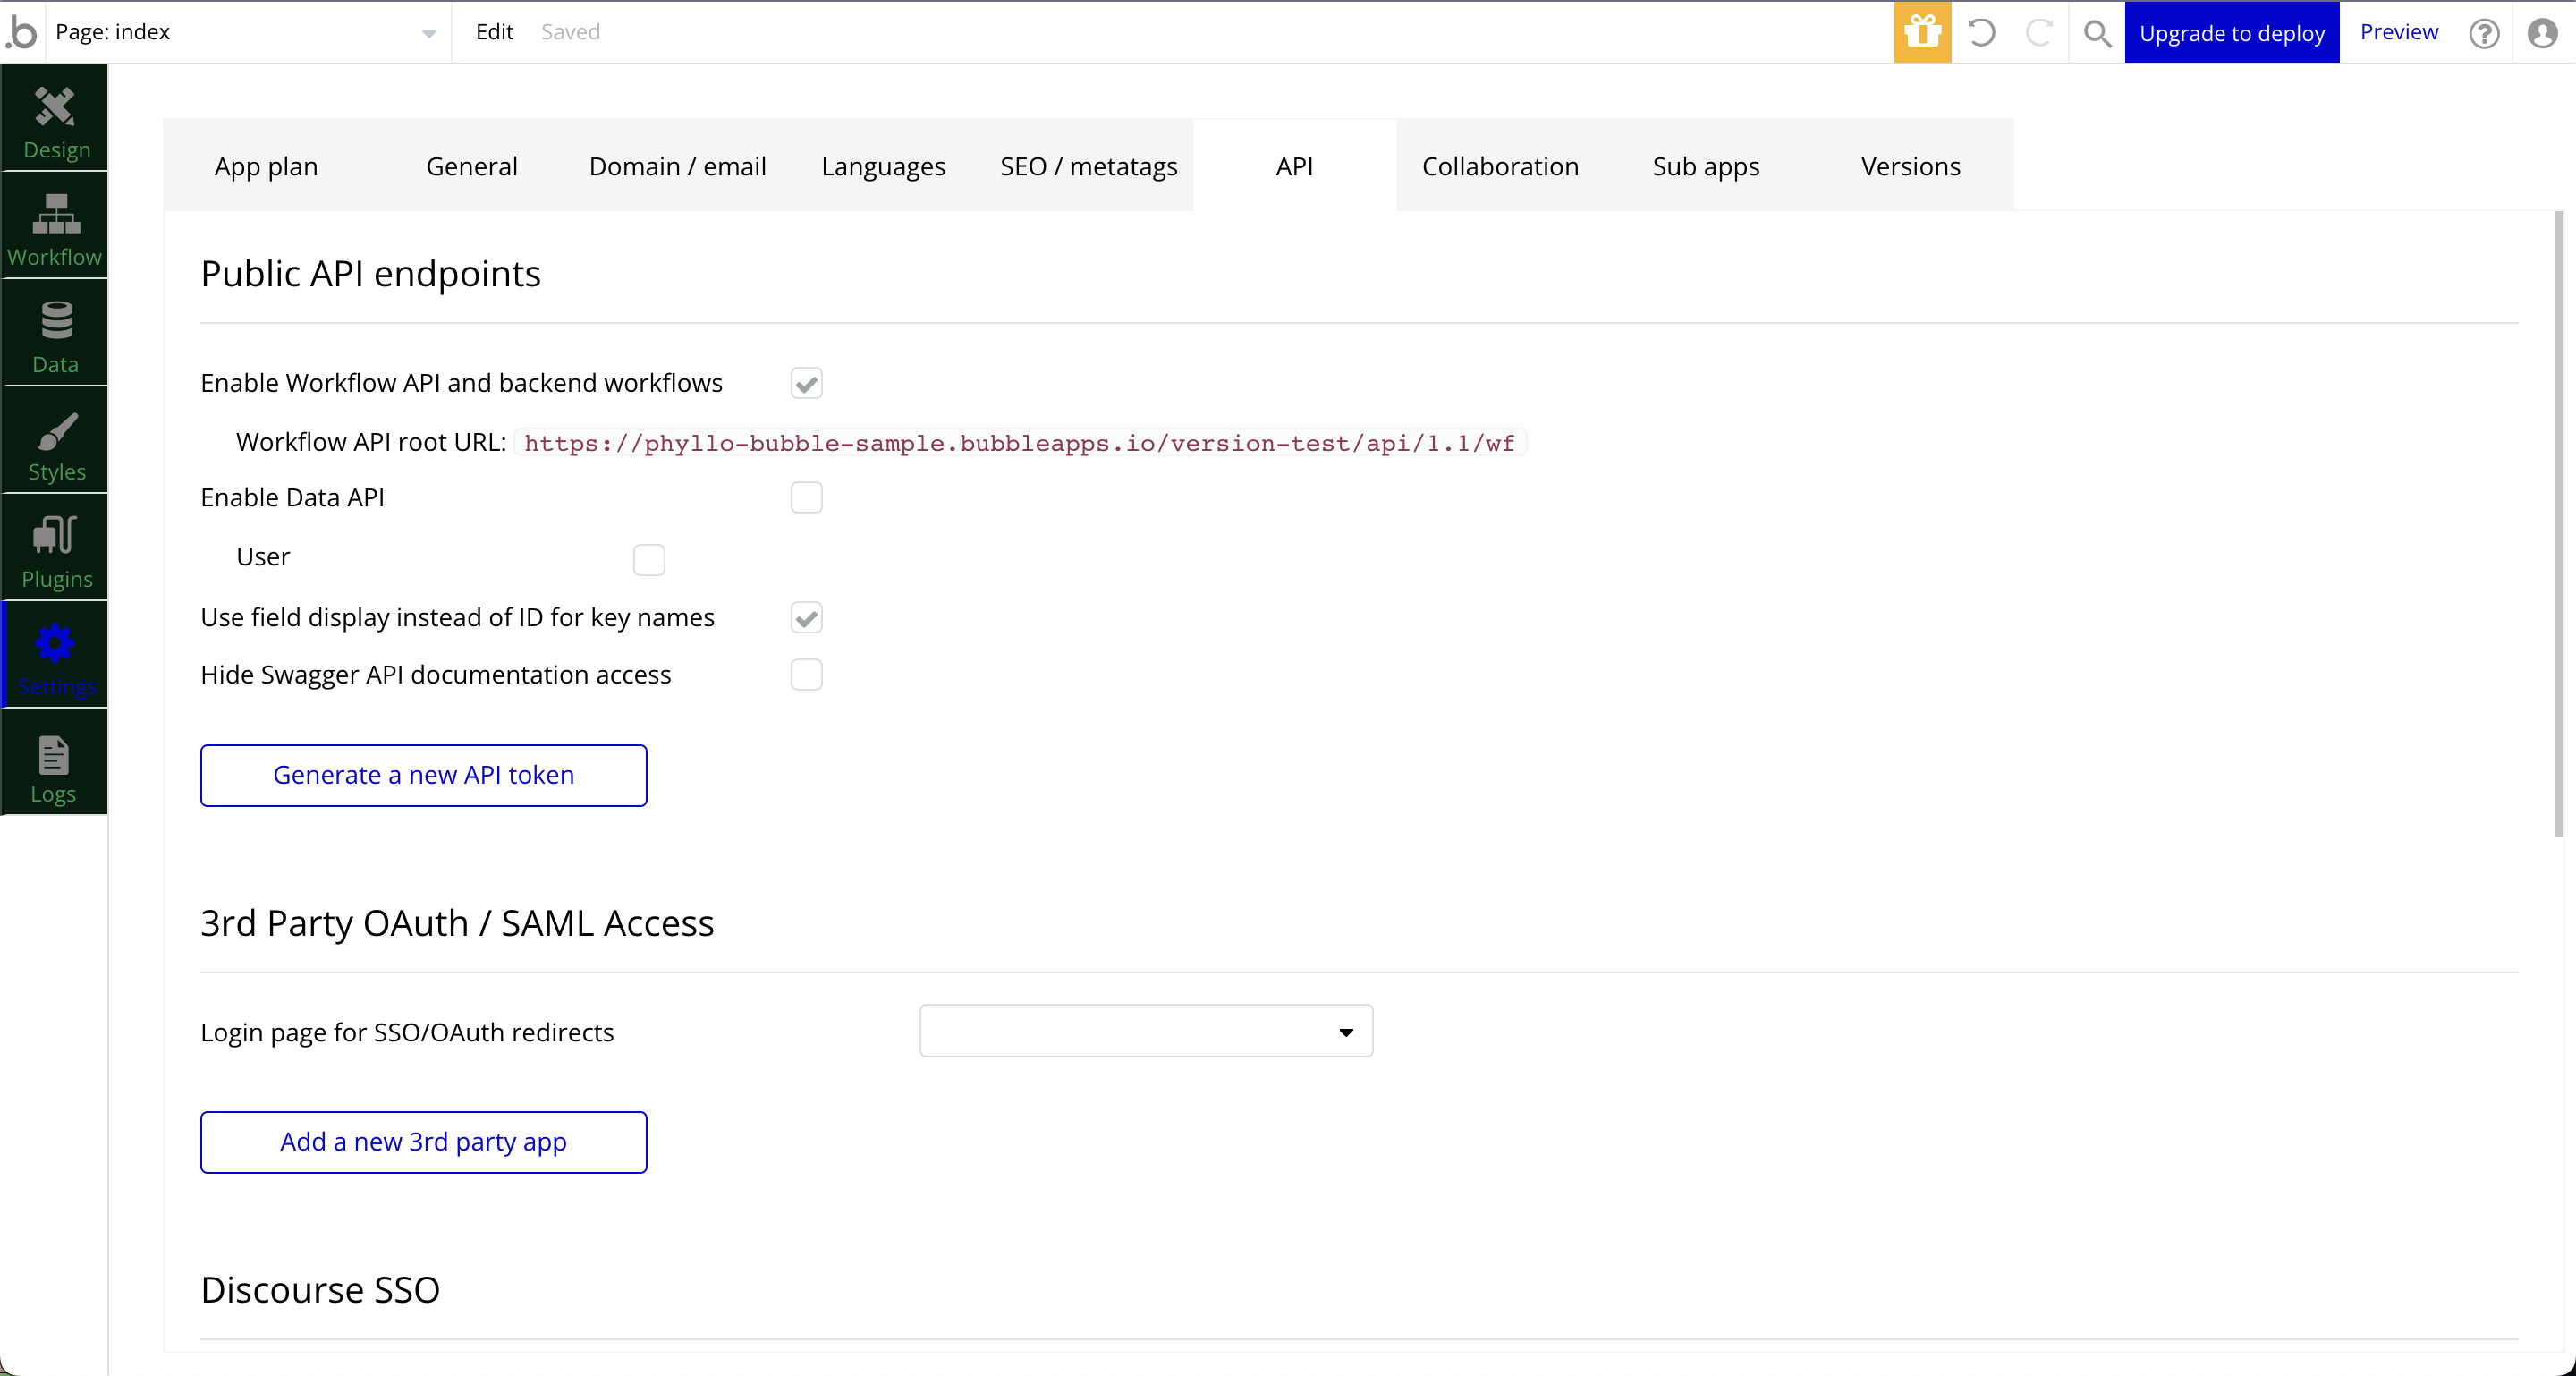
Click on the pages dropdown at the top left. A new option named "Backend workflows" would appear. Click on that. This is where you would create the webhook flows whenever required.
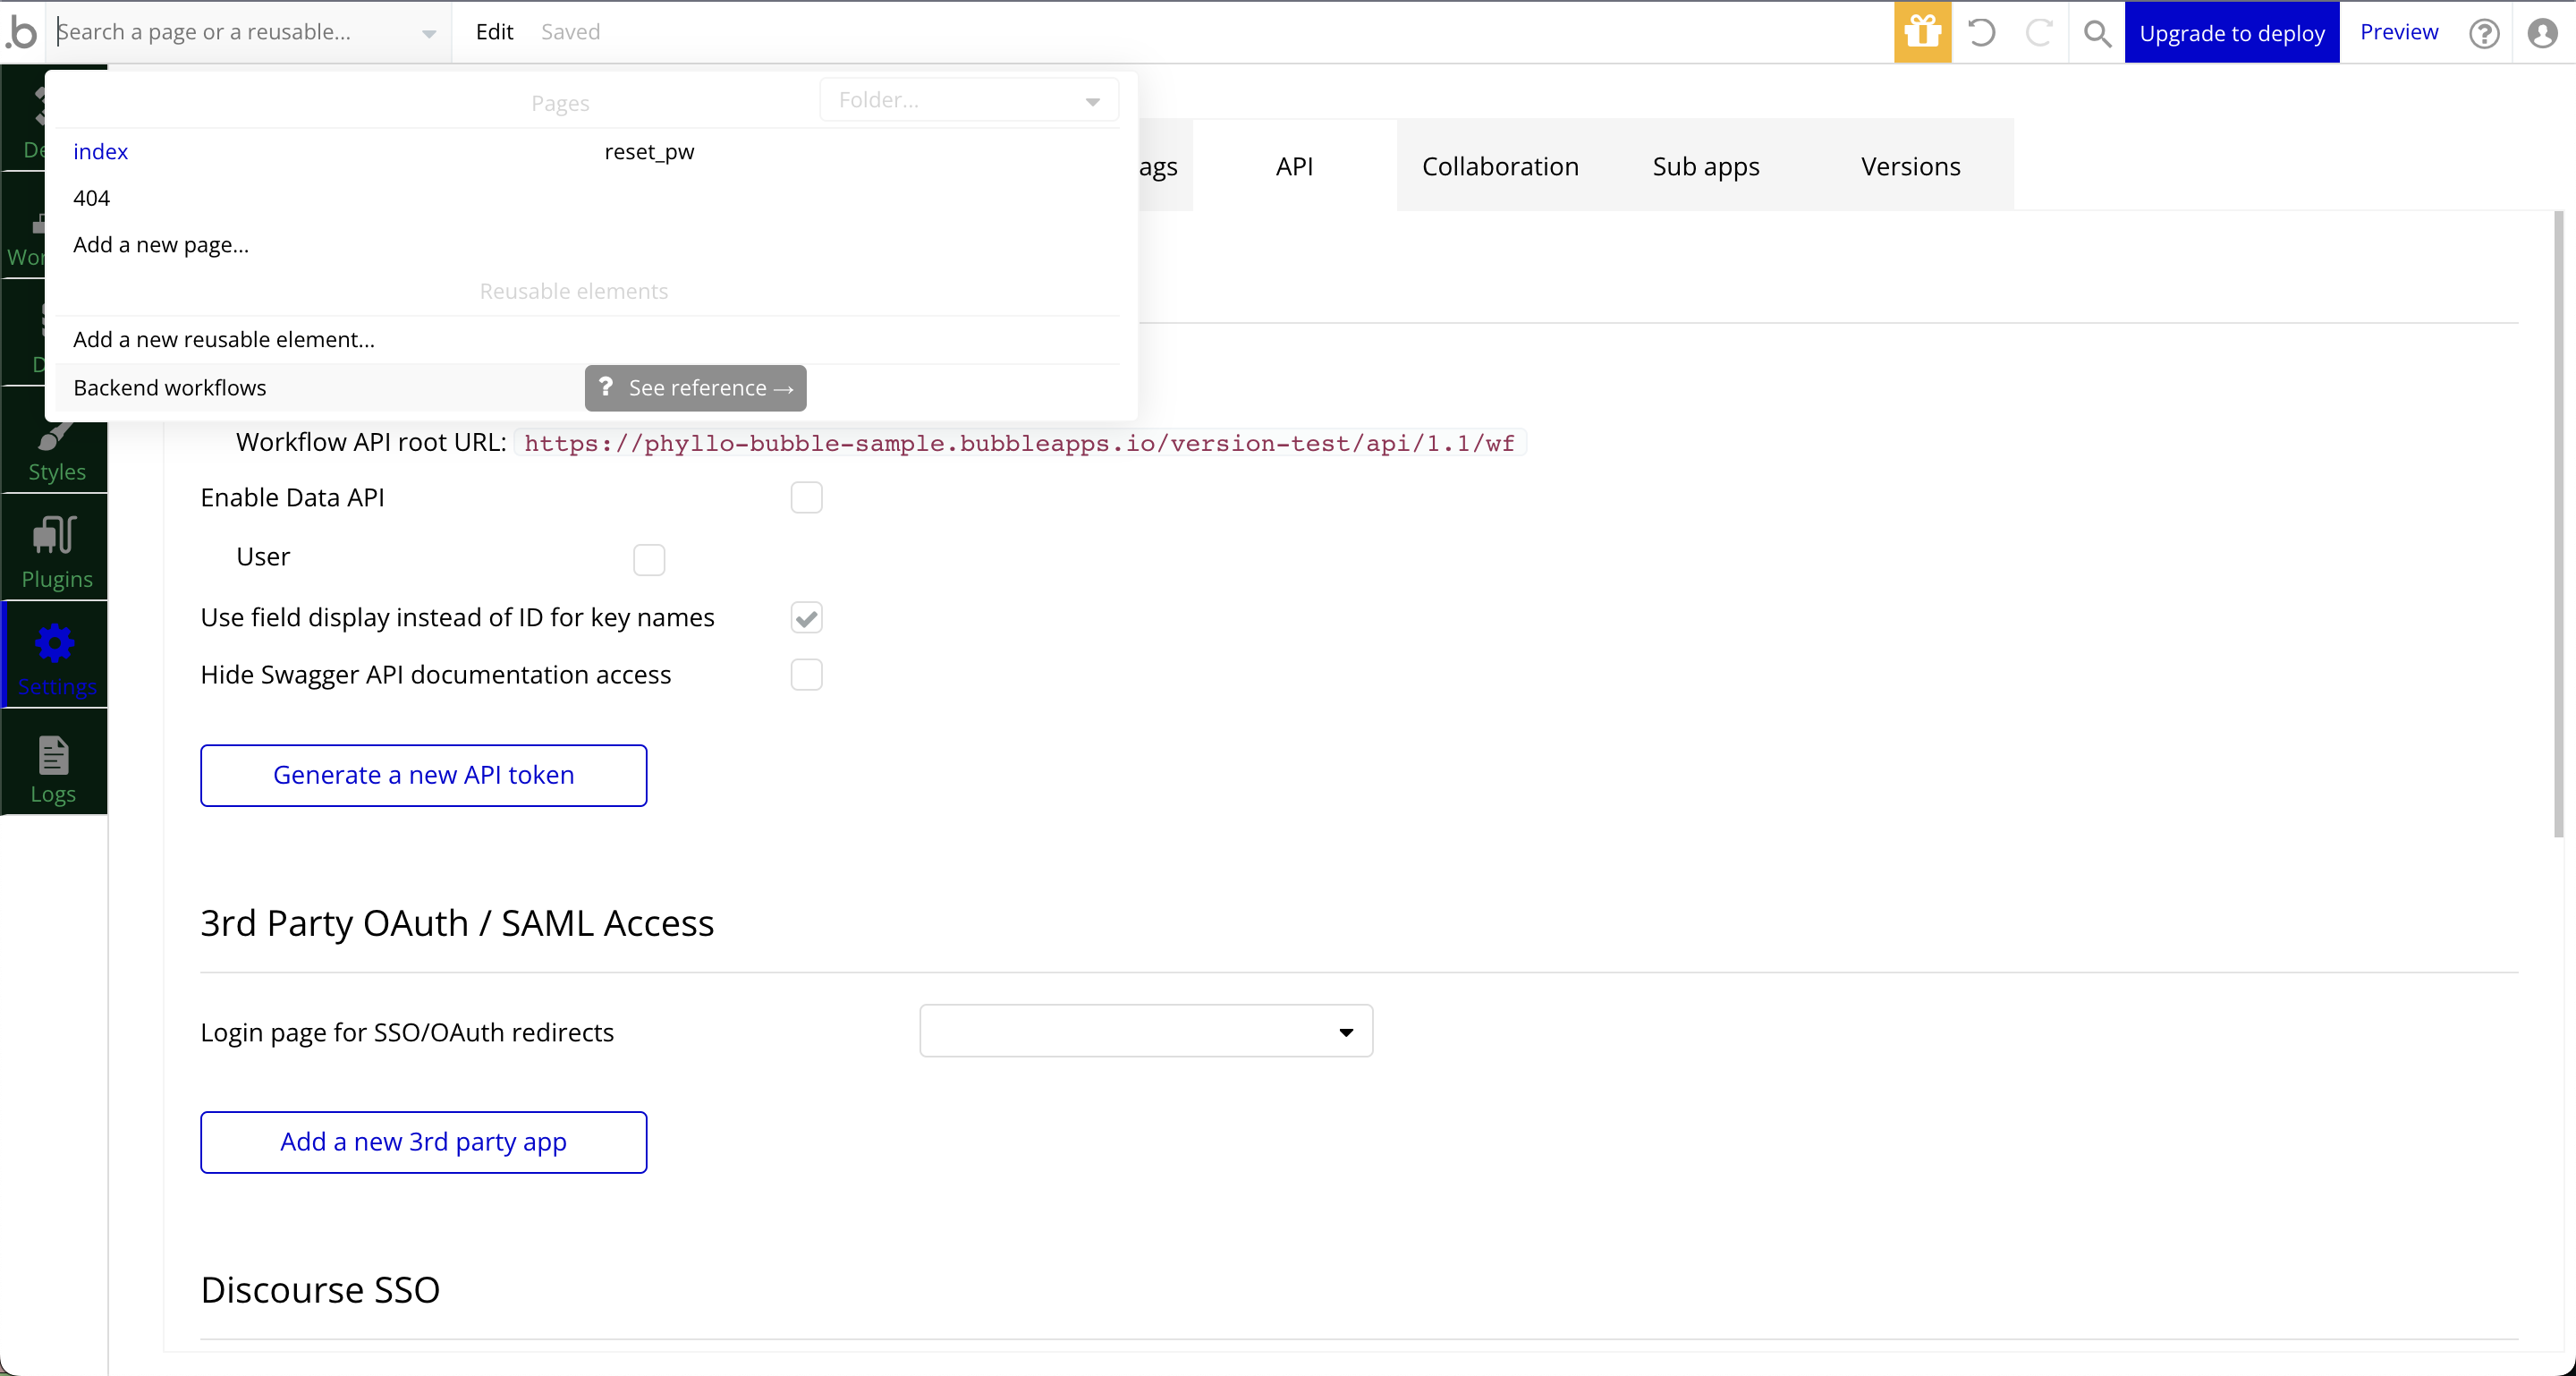
This is where we will come each time we have to set up a webhook or create an API workflow.
You're now all set to start using Phyllo in your workflows.
With the setup steps done, you're now ready to start seeing the Phyllo magic in action.
Account connection
1. Create a user
We recommend setting up this API step as a part of the user onboarding workflow.
This API call returns a unique user ID assigned by Phyllo to your users. You should ideally save this ID against the user's information in your db. This ID is used in the later steps.
Database change
Go to "Data" and select the data type "User".
Click on "Create a new field".
Enter the "Field name" as "Phyllo user ID" and "Field type" as "text".
Click "Create". This is what your data type should look like now.
Workflow setup
Go to whichever button action you use in your app to sign up the users or create one. Phyllo APIs are not meant to and cannot be used in an anonymous mode. You always need an identified user to work with their account connections and data.
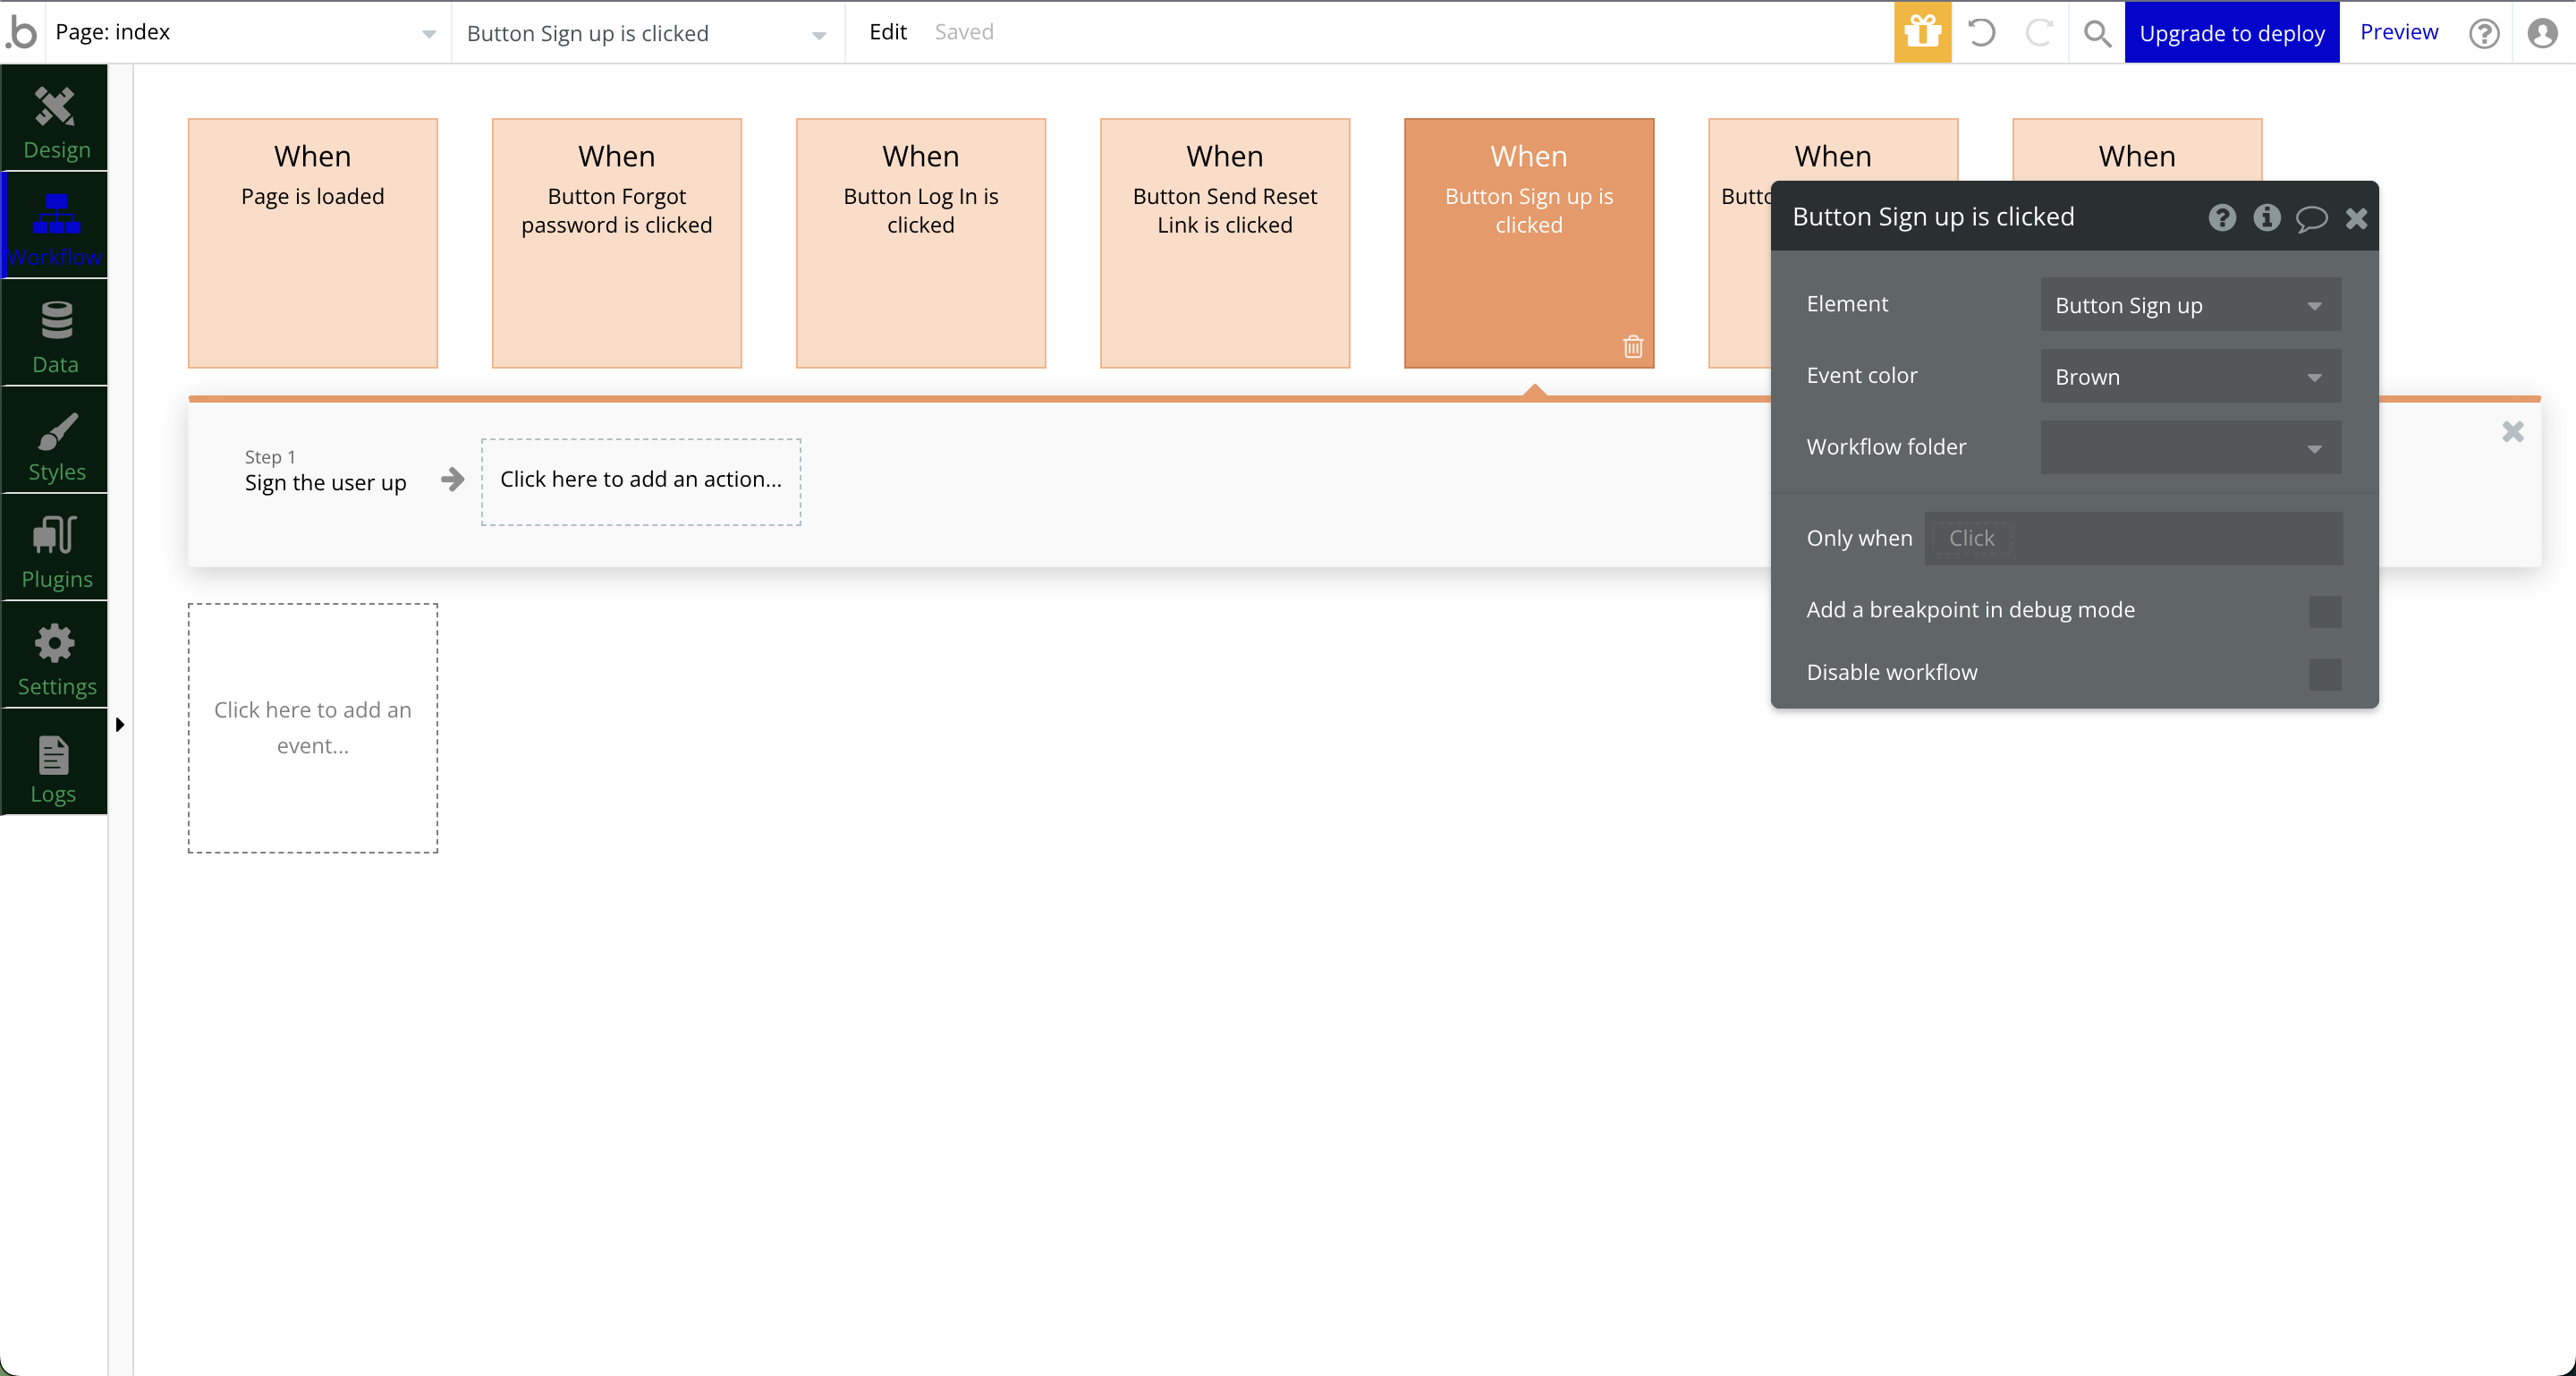
Edit the workflow.
Click on "add an action" after the "sign the user up" action. Select "Plugins" and click "Phyllo - Connect - Create a user". This step is available as a part of the "Phyllo APIs" plugin.
Enter the "environment" as
.stagingfor staging and leave it blank for production.Click on the "name" input field and select "Insert dynamic data".
Select the "Current user".
Select "'s email" (or if you ask for your user's name during signup, please use that instead).
Click on the "external_id" input field and select "Insert dynamic data".
Select the "Current user".
Select "'s unique id".
Click on "add an action" after the "Phyllo - Connect - Create a user" action. Select "Account" and click "Make changes to the current user".
Click on "Change another field".
Click on the newly appeared field and select "Phyllo user ID".
Click after the equals
=sign and select "Result of step 2".Select "'s id".
This workflow is now successfully set up to create a new Phyllo user ID whenever a new user signs up for your app.
2. Open the Connect SDK
First off, as promised, let's talk about the Connect SDK.
SDKs, in general, are a collection of programs designed to do specific tasks, sometimes in a predefined sequence. SDKs can be interacted with from outside the SDK using commands or functions.
The Connect SDK, very similarly, is a set of specialized programs. It helps educate the creators, builds trust between them and your app, and allows creators to grant access to their accounts and manage their permissions. The Connect SDK does all the heavy lifting of interfacing with the login screens and flow of the various platforms and showing appropriate steps and messages to the users. At the same time, it helps developers track the user actions and gives them the connection results and error messages, if any.
Opening the Connect SDK requires a token generated from the API to be passed to the plugin action and then receive the account connection information back. This step is a bit complex for non-technical users. We will break it down into two parts for ease of understanding - initiating the account connection at the user end and receiving/saving the account connection information in your backend workflows.
Initiating the account connection
This step involves actions from both the "Phyllo APIs" plugin and "Connect SDK" plugin.
Go to whichever button action you use in your app to start the user's account connection journey. This would always be somewhere after the user has logged in. We recommend adding this button somewhere in the flow when the user understands that they need to connect their accounts to continue further and indicates that they are ready to start the process.
Edit the workflow.
Click on "add an action" - this could be the first action or after anything else you might want to put in your workflow. Select "Plugins" and click "Phyllo - Connect - Create SDK token". This step is available as a part of the "Phyllo APIs" plugin.
This API step creates a short-lived token using the user's
Phyllo user IDand the product names of the data APIs from which you want to utilize the data. This token allows you to open the Connect SDK, where users can connect their accounts and grant permission to access their data. Let's give it the appropriate input.Enter the "environment" as
.stagingfor staging and leave it blank for production.Click on the "user_id" input field and select "Insert dynamic data".
Select the "Current user".
Select "'s Phyllo user ID".
Click on the input field "product" and enter the list of products according to what all data you want to gather from the user. This list should have the product names enclosed individually in double quotes(
") and separated by a comma(,). Example:"IDENTITY"or"IDENTITY", "ENGAGEMENT", "ENGAGEMENT.AUDIENCE". Here is a quick list to help you. Refer to this link for more info on this.IDENTITY-> Profile-related dataIDENTITY.AUDIENCE-> Audience demographics dataENGAGEMENT-> Posts by the user and related dataENGAGEMENT.AUDIENCE-> Data related to comments on the postsACTIVITY-> User activity related dataINCOME-> Direct platform income earned by creatorsPUBLISH.CONTENT-> Allows posting content via APIs
Click on "add an action" after the "Phyllo - Connect - Create SDK token" action. Select "Analytics" and click "Connect Phyllo SDK". This step is available as a part of the "Connect SDK" plugin.
Enter the "clientDisplayName" as the app name you want to show users in the account connection process.
Select the "environment" as either
stagingorproduction.Click on the "userId" input field and select "Insert dynamic data".
Select the "Current user".
Select "'s Phyllo user ID".
Click on the "token" input field and select "Insert dynamic data".
Select "Result of step 1".
Select "'s sdk_token".
You may, additionally, want to limit the users to connect to a single platform. To do that, you must enter the appropriate platform ID. A list of platforms and corresponding IDs can be found on this Airtable base.
Receiving/saving the account connection
After the user is done interacting with the SDK, you will receive the result of these interactions as webhooks for account connections or disconnections, represented by account ID(s). All future data fetches would take place using these account IDs. You should ideally save them against the user's information in your database. This step involves dealing with webhooks and making changes to the database. We'll go over these in detail below.
Database change
A user may connect to multiple accounts and disconnect them (or get disconnected due to session expiry or other reasons). Hence, we recommend creating a new "data type" in the Bubble database exclusively to save these mappings. Reference for these field names and data types can be found in the retrieve an account API.
Go to "Data" and create a new data type "Phyllo accounts". Check the "private by default" checkbox.
Click on "Create a new field".
Enter the "Field name" as "Phyllo user ID" and "Field type" as "text". Click "Create".
Click on "Create a new field". Enter the "Field name" as "Phyllo account ID" and "Field type" as "text". Click on "Create a new field". Click "Create".
Click on "Create a new field". Enter the "Field name" as "Phyllo work platform ID" and "Field type" as "text". Click on "Create a new field". Click "Create".
Click on "Create a new field". Enter the "Field name" as "Phyllo account status" and "Field type" as "text". Click "Create".
This is what your data type should look like now.
Tip: You may want to add more data fields from our accounts API depending on what info you need to store at your end. The above list is a must have and indicative, not exhaustive.
Workflow setup
Go to "Backend workflows". Create a new workflow by selecting "new API workflow".
Name the workflow "account_events". Check the boxes "expose as a public API workflow", "run without authentication", "ignore privacy rules", and "return a 200". Make sure the "trigger workflow with" is set to "POST".
Set the "parameter definition" to "detect request data" and check the "include headers" boxes.
Next, you would need to add the webhook parameters. These can be found on the webhook events page for all webhook events. We are explicitly looking for account-related events for now.
Click on "detect data".
Click on the URL in the next screen to copy it to the clipboard, or select and copy it.
Go to https://dashboard.insightiq.ai/webhooks in a new tab and log in to your Phyllo account.
Click on "Create webhook".
On the "create webhook" screen, set an appropriate name for your webhook in the "Name" field, such as "Bubble app account events".
Paste the URL in the "URL" field, without the
https://.In the "events" section, make sure only the "ACCOUNTS" related events are selected.
Click on the "Create webhook" button at the bottom of the page.
Go to the webhook events page on Phyllo documentation in a new tab and figure out the JSON sample for the corresponding events, which in our case would be under the Accounts section.
Hover on the JSON section and copy the JSON using the small copy button on the top right, or just select and copy.
Navigate to the "API references" section and locate "Send a mock webhook notification".
In the right column, delete the contents under the "Body" section starting with the opening curly braces (
{) on line number 2 till the closing curly braces (}) on line number 12. Paste the contents that we had copied in step 14.In the same right column, add your client ID and secret in the fields "Username" and "Password" respectively.
Click "Send API Request" button below the body. Wait for the request to complete with a
200 OKstatus code, which appears right below.Go back to where we had left the Bubble app to detect the webhook. If all the steps above were done right, it should have detected the webhook request by now and would be showing the parameters received via the webhook. Click "Save".
Click on "add an action" - this could be the first action or after anything else you might want to put in this workflow but before you process the data received in API workflow. Select "Plugins" and click (or search for) "Webhook verification". This step is a security related process that helps you to verify if the workflow is actually triggered by Phyllo or not. This step is available as a part of the "Phyllo APIs" plugin.
Click on the "Webhook body" input field and select "Insert dynamic data".
Select the "Request data".
Select "'s raw body text".
Click on the "Webhook secret" input field and enter the secret key obtained from Phyllo (the same one that you used on the plugin setup page in the "Password" field).
Click on the "Webhook signature" input field and select "Insert dynamic data".
Select the "Request data".
Select "'s header phyllo-signatures".
Click on "add an action" - this could be the first action or after anything else you might want to put in this workflow. Select "Plugins" and click "Phyllo - Connect - Retrieve an account". This step is available as a part of the "Phyllo APIs" plugin.
Enter the "environment" as
.stagingfor staging and leave it blank for production.Click on the "id" input field and select "Insert dynamic data".
Select "Request data".
Click on "'s body account_id".
Click on "Only when". We will add a condition to process the webhook data only if the webhook verification succeeds.
Select "result of step 1".
Select "is yes".
Click on "add an action" after the "Phyllo - Connect - Retrieve an account" action. Select "Data (Things)" and click "Create a new thing".
Select the "type" as "Phyllo accounts".
Click on "Set another field".
Click on the newly appeared field and select "Phyllo user ID".
Click after the equals
=sign and select "Result of step 2".Select "'s user id".
Click on "Set another field". Click on the newly appeared field and select "Phyllo account ID".
Click after the equals
=sign and select "Result of step 2".Select "'s id".
Click on "Set another field". Click on the newly appeared field and select "Phyllo work platform ID".
Click after the equals
=sign and select "Result of step 2".Select "'s work_platform id".
Click on "Set another field". Click on the newly appeared field and select "Phyllo account status".
Click after the equals
=sign and select "Result of step 2".Select "'s status".
We would only want to create a new entry when we know it doesn't already exist. We would use the "only when" condition in Bubble to achieve this.
Click on "only when".
Select "do a search for".
Click the "type" in newly appeared box, and select "Phyllo accounts".
Click on "add a new constraint".
Click on the newly appeared field and select "Phyllo account ID".
Click on the next section and select "=".
Click on the next section and select "Result of step 2".
Select "'s id".
Click on the "close" button in the side box.
In the "only when" section, continue by clicking on "count".
Continue by clicking on "is".
Continue by entering "0" in the next box.
If there is already an existing entry for the something, we would want to update that instead. We would do this in a new step that updates existing things and search for the existing item by its ID to ensure that we update the correct entry.
Click on "add an action" after the "Create a new Phyllo accounts" action. Select "Data (Things)" and click "Make changes to thing".
Select the "Thing to change" as "Do a search for".
Click the "type" in newly appeared box, and select "Phyllo accounts".
Click on "add a new constraint".
Click on the newly appeared field and select "Phyllo account ID".
Click on the next section and select "=".
Click on the next section and select "Result of step 2".
Select "'s id".
Click on the "close" button in the side box.
In the "Things to change" section, continue by clicking on ":first item".
Click on "Change another field".
Click on the newly appeared field and select "Phyllo user ID".
Click after the equals
=sign and select "Result of step 2".Select "'s user id".
Click on "Set another field". Click on the newly appeared field and select "Phyllo account ID".
Click after the equals
=sign and select "Result of step 2".Select "'s id".
Click on "Set another field". Click on the newly appeared field and select "Phyllo work platform ID".
Click after the equals
=sign and select "Result of step 2".Select "'s work_platform id".
Click on "Set another field". Click on the newly appeared field and select "Phyllo account status".
Click after the equals
=sign and select "Result of step 2".Select "'s status".
Phyllo dashboard setup
That should be it. Once you are done with the above setup, go to the Phyllo dashboard at https://dashboard.insightiq.ai/webhooks and click on the edit button for the webhook we created. Delete the /initialize from the end of the URL and click "Save changes".
However, if you are creating a new workflow without the "Detect request data" step (which we highly recommend, by the way) or are reusing an existing workflow, you would need to link back to the workflow to receive the data when the webhook is triggered. Let's see how you can do this.
Go to https://dashboard.insightiq.ai/webhooks and log in to your Phyllo account.
Click on "Create webhook".
On the "create webhook" screen, set an appropriate name for your webhook in the "Name" field, such as "Bubble app account events".
In the "events" section, make sure only the "ACCOUNTS" related events are selected.
Now only the URL is left. Let's figure that out from our Bubble app.
Find out the root URL of your Workflow API by going to the "API" section in your Bubble app's "Settings".
Copy this URL from after the
https://part and paste it into the "URL" field of the "Create webhook" page on the Phyllo dashboard.Find your workflow name by going to the "Backend workflows" and selecting the workflow you set up in the previous step. We had set it to
account_events, but you could set it to anything else.Copy this name.
Go back to the "Create webhook" page. Type a
/character in the URL field and paste the workflow name after that. It should look something like this.Click on the "Create webhook" button at the bottom of the page.
Phyllo webhook should be ready to start sending events to Bubble.
The dashboard setup steps remain the same for Staging and Production environments except the fact that you would need to change the environment on the dashboard using the dropdown near top left. But the URL you would get from Bubble, would be different for different environments even for the same app. Make sure to create a webhook on Phyllo dashboard in Production environment with the new/updated URL when you deploy your Bubble app to Live.
Finally, the account connection info is set up to be available in your database. Now after the user connects their account(s) and you have that info in your database, we can start fetching the data corresponding to those account(s). Let's see how we can do that in the next section.
Listen to webhook notifications for updates
Once the user has connected their accounts, you can tap into their data. Let's understand more about webhooks and see how you can set up your API workflows to start fetching data.
To proceed further, you need to understand the different product APIs and the data points they provide. The product description page can help you understand the different Phyllo products, and then the API reference can help you understand the data provided by each API and how to use it.
Each API product also has its own webhook events. The complete list of webhook events, their meanings, and how to process them (including which follow-up API to call) is available on our webhook events page.
For this tutorial, let's assume you want to get the profile data using identity APIs. You would start listening to the profile-related webhooks PROFILES.ADDED and PROFILES.UPDATED, add a step in your workflow to fetch the profile data, and then save the resulting data in your db (or if you want to process it in another way, that's up to you). You can set up similar workflows for all the data APIs and their webhook events. Let's see these steps below.
Database change
You would receive profile-related data at the end of the workflow. Hence, we recommend creating a new "data type" in the Bubble database exclusively to save these data points. Reference for these field names and data types can be found in the retrieve a profile API.
Go to "Data" and create a new data type "Phyllo profile". Check the "private by default" checkbox.
Click on "Create a new field".
Enter the "Field name" as "Phyllo account ID" and "Field type" as "text". Click "Create".
Similarly, create new "text" fields named "Phyllo profile ID", "platform_username", "full_name", "first_name", "last_name", "url", "introduction", "image_url", "gender", "country", "platform_profile_name". Create a new "yes/no" field for "is_verified". Create new "number" fields for "follower_count", "following_count", "subscriber_count", "content_count", "content_group_count", "watch_time_in_hours".
This is what your data type should look like now.
Workflow
Go to "Backend workflows". Create a new workflow by selecting "new API workflow".
Name the workflow "profile_events". Check the boxes "expose as a public API workflow", "run without authentication", "ignore privacy rules", and "return a 200". Make sure the "trigger workflow with" is set to "POST" and "parameter definition" is set to "detect request data" with the checkbox for "include headers" checked.
Next, you would need to add the webhook parameters. These can be found on the webhook events page for all webhook events. We are explicitly looking for profiles-related events for now.
Click on "detect data".
Click on the URL in the next screen to copy it to the clipboard, or select and copy it.
Go to https://dashboard.insightiq.ai/webhooks in a new tab and log in to your Phyllo account.
Click on "Create webhook".
On the "create webhook" screen, set an appropriate name for your webhook in the "Name" field, such as "Bubble app profile events".
Paste the URL in the "URL" field, without the
https://.In the "events" section, make sure only the "ACCOUNTS" related events are selected.
Click on the "Create webhook" button at the bottom of the page.
Go to the webhook events page on Phyllo documentation in a new tab and figure out the JSON sample for the corresponding events, which in our case would be under the Profiles section.
Hover on the JSON section and copy the JSON using the small copy button on the top right, or just select and copy.
Navigate to the "API references" section and locate "Send a mock webhook notification".
In the right column, delete the contents under the "Body" section starting with the opening curly braces (
{) on line number 2 till the closing curly braces (}) on line number 12. Paste the contents that we had copied in step 14.In the same right column, add your client ID and secret in the fields "Username" and "Password" respectively.
Click "Send API Request" button below the body. Wait for the request to complete with a
200 OKstatus code, which appears right below.Go back to where we had left the Bubble app to detect the webhook. If all the steps above were done right, it should have detected the webhook request by now and would be showing the parameters received via the webhook. Click "Save".
Click on "add an action" - this could be the first action or after anything else you might want to put in this workflow but before you process the data received in API workflow. Select "Plugins" and click (or search for) "Webhook verification". This step is a security related process that helps you to verify if the workflow is actually triggered by Phyllo or not. This step is available as a part of the "Phyllo APIs" plugin.
Click on the "Webhook body" input field and select "Insert dynamic data".
Select the "Request data".
Select "'s raw body text".
Click on the "Webhook secret" input field and enter the secret key obtained from Phyllo (the same one that you used on the plugin setup page in the "Password" field).
Click on the "Webhook signature" input field and select "Insert dynamic data".
Select the "Request data".
Select "'s header phyllo-signatures".
Click on "add an action" - this could be the first action or after anything else you might want to put in this workflow. Select "Plugins" and click "Phyllo - Identity - Retrieve a profile". This step is available as a part of the "Phyllo APIs" plugin.
Enter the "environment" as
.stagingfor staging and leave it blank for production.Click on the "profile_id" input field and select "Insert dynamic data".
Select "Request data".
Click on "'s body profile_id".
Click on "Only when". We will add a condition to process the webhook data only if the webhook verification succeeds.
Select "result of step 1".
Select "is yes".
Click on "add an action" after the "Phyllo - Identity - Retrieve a profile" action. Select "Data (Things)" and click "Create a new thing".
Select the "type" as "Phyllo profile".
Click on "Set another field".
Click on the newly appeared field and select "Phyllo profile ID".
Click after the equals
=sign and select "Result of step 2".Select "'s id".
Click on "Set another field". Click on the newly appeared field and select "Phyllo account ID".
Click after the equals
=sign and select "Result of step 2".Select "'s account id".
Keep setting more fields by clicking on "Set another field" and creating mappings from the "result of step 2".
We would only want to create a new entry when we know it doesn't already exist. We would use the "only when" condition in Bubble to achieve this.
Click on "only when".
Select "do a search for".
Click the "type" in newly appeared box, and select "Phyllo profile".
Click on "add a new constraint".
Click on the newly appeared field and select "Phyllo profile ID".
Click on the next section and select "=".
Click on the next section and select "Result of step 2".
Select "'s id".
Click on the "close" button in the side box.
In the "only when" section, continue by clicking on "count".
Continue by clicking on "is".
Continue by entering "0" in the next box.
If there is already an existing entry for something, we would want to update that instead. We would do this in a new step that updates existing things and search for the existing item by its ID to ensure that we update the correct entry.
Click on "add an action" after the "Create a new Phyllo profile" action. Select "Data (Things)" and click "Make changes to thing".
Select the "Thing to change" as "Do a search for".
Click the "type" in newly appeared box, and select "Phyllo profile".
Click on "add a new constraint".
Click on the newly appeared field and select "Phyllo profile ID".
Click on the next section and select "=".
Click on the next section and select "Result of step 2".
Select "'s id".
Click on the "close" button in the side box.
In the "Things to change" section, continue by clicking on ":first item".
Click on "Change another field".
Click on the newly appeared field and select "Phyllo profile ID".
Click after the equals
=sign and select "Result of step 2".Select "'s id".
Click on "Set another field". Click on the newly appeared field and select "Phyllo account ID".
Click after the equals
=sign and select "Result of step 2".Select "'s account id".
Keep setting more fields by clicking on "Set another field" and creating mappings from the "result of step 2".
Phyllo dashboard setup
Similar to the previous workflow setup, delete the /initialize from the end of the webhook URL from Phyllo dashboard.
Following the above steps would make sure that whenever a Phyllo webhook related to Profiles information is trigerred, it's data immediately becomes available in your database.
A few important things to keep in mind:
You can only set up to 3 webhooks on Phyllo, so you would need to start processing more kinds of data in the same API workflow.
You can use the
eventproperty received in the workflow API to do this. Your step 2, which would look like "retrieve something from Phyllo", would also start depending on an "only when" condition, which matches the "event" with the type of information to be retrieved using that API.A complete list of "events", what product they correspond to, and which API to use to retrieve the related data can be found on the webhook events page.
Data fetch
Although we recommend using our data fetch APIs in conjunction with webhooks only, we are listing down the steps to fetch and store data in this section. These may be useful for running a recurring or scheduled event, some API action triggered in response to a UI interaction, forcing a data refresh, or some other use case.
We will take the same example of fetching profile data using Identity APIs and start from scratch.
Database change
You would receive profile-related data at the end of the workflow. Hence, we recommend creating a new "data type" in the Bubble database exclusively to save these data points. Reference for these field names and data types can be found in the retrieve a profile API.
Go to "Data" and create a new data type "Phyllo profile". Check the "private by default" checkbox.
Click on "Create a new field".
Enter the "Field name" as "Phyllo account ID" and "Field type" as "text". Click "Create".
Similarly, create new "text" fields named "Phyllo profile ID", "platform_username", "full_name", "first_name", "last_name", "url", "introduction", "image_url", "gender", "country", "platform_profile_name". Create a new "yes/no" field for "is_verified". Create new "number" fields for "follower_count", "following_count", "subscriber_count", "content_count", "content_group_count", "watch_time_in_hours".
This is what your data type should look like now.
Workflow
Go to whichever workflow you want to run this with.
Click on "add an action" after anything else you might have or want to put in this workflow. Select "Plugins" and click "Phyllo - Identity - Retrieve a profile". This step is available as a part of the "Phyllo APIs" plugin.
Enter the "environment" as
.stagingfor staging and leave it blank for production.Click on the "profile_id" input field and select how you want to pass the profile ID to this action based on your workflow requirements.
Click on "add an action" after the "Phyllo - Identity - Retrieve a profile" action. Select "Data (Things)" and click "Create a new thing".
Select the "type" as "Phyllo profile".
Click on "Set another field".
Click on the newly appeared field and select "Phyllo profile ID".
Click after the equals
=sign and select "Result of step 1".Select "'s id".
Click on "Set another field". Click on the newly appeared field and select "Phyllo account ID".
Click after the equals
=sign and select "Result of step 1".Select "'s account id".
Keep setting more fields by clicking on "Set another field" and creating mappings from the "result of step 1".
We would only want to create a new entry when we know it doesn't already exist. We would use the "only when" condition in Bubble to achieve this.
Click on "only when".
Select "do a search for".
Click the "type" in newly appeared box, and select "Phyllo profile".
Click on "add a new constraint".
Click on the newly appeared field and select "Phyllo profile ID".
Click on the next section and select "=".
Click on the next section and select "Result of step 1".
Select "'s id".
Click on the "close" button in the side box.
In the "only when" section, continue by clicking on "count".
Continue by clicking on "is".
Continue by entering "0" in the next box.
If there is already an existing entry for something, we would want to update that instead. We would do this in a new step that updates existing things and search for the existing item by its ID to ensure that we update the correct entry.
Click on "add an action" after the "Create a new Phyllo profile" action. Select "Data (Things)" and click "Make changes to thing".
Select the "Thing to change" as "Do a search for".
Click the "type" in newly appeared box, and select "Phyllo profile".
Click on "add a new constraint".
Click on the newly appeared field and select "Phyllo profile ID".
Click on the next section and select "=".
Click on the next section and select "Result of step 1".
Select "'s id".
Click on the "close" button in the side box.
In the "Things to change" section, continue by clicking on ":first item".
Click on "Change another field".
Click on the newly appeared field and select "Phyllo profile ID".
Click after the equals
=sign and select "Result of step 1".Select "'s id".
Click on "Set another field". Click on the newly appeared field and select "Phyllo account ID".
Click after the equals
=sign and select "Result of step 1".Select "'s account id".
Keep setting more fields by clicking on "Set another field" and creating mappings from the "result of step 1".
The steps would remain almost similar for all of our APIs, except for the required inputs and the data types to store the received outputs. Our exhaustive API reference can help you find all of these.
With this, we come to the end of our tutorial on how to use Phyllo's Bubble plugins. We hope you build exciting things with this! Feedback, suggestions, and bug reports are strongly encouraged and warmly received at [email protected].